Lori Explains How to Catch a Bad Attitude

Lori Daniels explains how to catch a bad attitude. It’s unique body position requires a level of flexibility and strength that keep many players from trying it. When executed well, it can be quite beautiful and graceful or explosive.

To perform a Bad Attitude, think of doing a quad stretch. Bend your knee so your foot comes towards your bottom. Then grab your ankle. The difference for the bad attitude is that you grab the inside of your ankle. Well, you don’t grab it at all, you reach around it to catch the frisbee. To open the window for the catch, bend at the hip on your planted foot, and squeeze your side, glute, and quad muscles on the elevated leg side. This will help you lift your hand as high as possible. The higher your hand, the bigger the window and the prettier the catch looks.

Episode 1 – The Beast Shares His Wisdom

The Beast
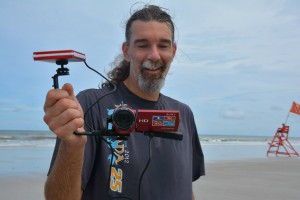
Jake & Randy shoot the Frizbreeze with Steve Hays, AKA, the Beast.

  • The Beast shares his thoughts on making Freestyle more audience friendly.
  • He also adds a historical perspective on the topic; after all, he has been playing since 1977.
  • What parallels can be made to other sports that might move this discussion forward?
  • Also, find out some fun facts that surprise them all.
  • Click to learn out how to do a “Bad Attitude” discussed during the podcast.

Receive new Episodes
[mc4wp_form id=”1324″]

How to Catch a Triple Fake

In this brief video I demonstrate how to catch a triple fake. It’s a nice alternative to under the leg or behind the back for a disc that is in the waist zone. As a blind catch, it can be more difficult than it looks. But with practice, it looks quite graceful.

To execute, do a self set or have someone throw to you. Watch the disc. Reach across your stomach and around towards your back. As you reach, spin your body around to propel your hand towards the disc. Keep you eye on it as long as possible. As you begin to lose sight snap your body around faster and make the grab.

Bonus points for if you can throw left and catch right, the throw right and catch left.

Anyone know why this catch is called a triple fake?

The Self Set Throw – How to Practice Catching

Ryan Young teaches how to throw to yourself so you have the perfect set for practicing a trick catch. By using this throw, you will put the disc into the air with the perfect nose and enough spin to keep it stable. Thus you can practice any catch and spins as well.

As always, start by facing the wind. Grip the disc with a backhand grip at 3 o’clock (or 9 for counter). Now lift your arm and pivot your hand towards 6 o’clock. As your hand pivots, let the disc roll in your fingers so that it moves away from your palm. This is what generates the spin. As your hand gets to 6, release the disc into the air. The goal is to have about a 45 degree angle. The disc should float gently up and then back down and slide slightly towards you as it falls. Now you can make a trick catch.

I like to call this throw a luff, in reference to a sailing ship being steered into the wind so that the sails just begin to flap. Since the goal of this throw is to be a perfect set, you want perfect wind position and only enough spin to keep the disc stable, but no more. This throw is a necessity for catch mastery and can be used as a close up speed flow pass to a friend.

Word of the Day: Nail Hell

Sam’s third reglue attempt. It took 5 attempts before this nail stayed on.

Nail Hell (adjective)

Nail Hell describes the feeling when one’s freestyle frisbee nails repeatedly pop off during the jam. There is disagreement in the community as to whether it takes two or three losses of the nail for one to officially be in Nail Hell. Either way, Nail Hell is especially miserable because the desire to jam is always strongest when others are jamming in plain view. Yet, if the nails will not stay on, one must sit down and reglue.

Example: I always end up in Nail Hell when the weather is cold like this.

See also: Boosh, Condo

How to Live Stream Your Event – Introduction

How to Live Stream Like a Pro

In this series I’ll explain how to live stream (also known as webcast) a freestyle frisbee event. I have live streamed many FPA World Championships and other events and have learned many things along the way. Though I still plan to stream many more events I just can’t get to all of them. I want to share the live streaming knowledge in the hopes that more events show up online. If you want to stream an event that’s not Freestyle Frisbee, stay tuned as this series can help you as well.

Note, links to equipment below are the current or newer versions of what I use in my kit. Your use of these links helps pay for future Freestyle Frisbee live streaming.

To deliver a successful live stream, it helps to have a basic understanding of how it all works. In the most basic form it works like this. A camera at the event captures all the action and turns it into an audio/video signal. This signal is something like what comes from a DVD player. In other words, if you connected it to your TV, you’d see it on the TV screen.

The signal leaves the camera, usually over an HDMI cable, and then enters an encoding device. This device converts the audio/video signal for the internet. In most cases this device is a computer, though there are other methods.

For a computer to accept a video signal, it needs a special device called a capture card. On one side the capture card connects to the computer via USB or Thunderbolt and on the other side it connects to the camera via HDMI. It’s sole purpose it to convert the audio/video signal so the computer can accept and process it.

Telestream Wirecast

So now that the computer has the signal it encodes it to a format that can be sent over the internet. This format is usually compressed as H.264. In other words, its smaller so it can make it across the internet in real time. It does this using software meant for webcasting. I like to use Telestream’s Wirecast.

Once encoded, the computer sends the signal to a Live Streaming service. This service accepts the signal and makes it available for anyone who wants to watch. When someone opens up the video player, the service will send the signal to their screen. This service is what takes a single audio/video signal and duplicates it so that multiple people can watch. The service I most recently used was YouTube.

OK, so the list for a basic stream looks like this:

  1. Camera
  2. Capture Device
  3. Computer
  4. Software
  5. Internet Access
  6. Streaming Service

But wait, that’s the most basic setup. What if you want to take your stream to the next level? Multiple camera angles? Professional sounding audio? HD? Video that doesn’t stutter, has good lighting, and is pleasing to watch? Audience engagement? Well it takes some effort but it’s well worth it. Here is my kit:

  1. 2 or 3 cameras
  2.  Tripod for every camera
  3. Memory cards so the cameras can record as they stream, a backup so nothing gets lost
  4. Stacks of camera batteries
  5. Macbook Pro with Wirecast
  6. Pre-recorded videos for filler
  7. Graphics E.G. to show team’s names before they start
  8. 2 or 3 Black Magic capture devices
  9. 2nd computer to monitor the stream and for backup
  10. Sound mixing board (or 2) with a line to the DJ
  11. 2 microphones to pick ambient sound
  12. 2 Microphones to talk to the Audience as the host
  13. Internet access provided by the event
  14. Youtube for a streaming service though I am looking into alternatives
  15. Batteries for the computers
  16. Volunteers to help

In the future articles I’ll go into details about each item, planning and testing, the process during an event, and give a few step-by-step guides to help ease the learning curve. If you’re interested to host your own live stream, please subscribe so you can see the articles as soon as they are released. If you have any questions, please leave them in the comments below and I will do my best to answer.

How to Throw an Overhand Wrist Flip

Ryan Young teaches us how to throw an overhand wrist flip. The first throw most of us learn is a backhand with our dominant hand. The overhand wrist flip is a good second throw for freestyle because it comes out with the opposite spin of the backhand. So, right handed people can use their right hand throw clock with a backhand and counter with an overhand wrist flip and vice versa for lefties. The overhand wrist flip is also useful because it’s easy to throw it to yourself for practicing other tricks. Having both throws means you can practice with both spins.

Watch the video for the explanation of performing this throw. Ryan does an excellent job in his demonstration.

Rim Delay to Center Delay

Lori Daniels demonstrates going from a rim delay to a center delay. This is a critical skill that marks a new level of nail delay control in one’s game. It is used all the time since the disc may come in at and any angle. It is also used if center control is lost. As this skill improves so will center control and eventually you’ll be able to set and angle you want.

Here Lori uses a technique swooping down and then lifting upwards. As the disc travels up push across at a right angle to the center. This will cause the disc to tilt and flatten outs. As it flattens spiral your nail in towards the center and gain center delay control. For an in-depth written description of this skill, check out this article I wrote back in the 90s.

Heinsville’s New Alias – frisbeeguru.com

Frisbee Guru

Heinsville is such a fun concept for Freestyle Frisbee Players. Hein means to play at your best, so Heinsville is the place all the players want to be. In Heinsville the disc is always slick, the wind never gusts, your nails don’t fall off, and you never get tired.

Of course, this site is all about spreading the jam, teaching others, sharing the culture, and growing the sport. As fun as the name heinsville is, it’s difficult to share with those who don’t yet know the language, which is of course a big part of the target audience.

Enter Heinsville’s new alias: frisbeeguru.com. Now, if you meet someone who might be interested in learning a few tricks, just tell them to go to frisbeeguru.com and they will end up at Heinsville.

The frisbee guru has reached the third level of transcendence of the disc. He sits in the lotus position while frisbees float about under his complete control. He is one with the disc, the wind, and himself. Now go out and spread the word. The Frisbee Guru has arrived.

How to Set from a Rim Delay

Ryan Young teaches us how to set the disc from a rim delay. The goal of a set is to put the disc up into the air in a position that leads into the next trick. Here Ryan demonstrates using the rim delay technique to do this. First, consider the ideal placement of the set. That is, nose away from you at 12 o’clock. This allows for easier catching. Now, take the disc on a rim delay. Begin a swooping motion that goes down and then up. The goal is to time the upward motion so that the disc is sent into the air with the nose at 12 o’clock. As the disc rotates around, pull in your elbow to keep the disc from running into it. Just before the nose is in the right place end the swoop by pushing up a little harder. The goal is to propel the disc into the air. Congratulations, you have just used a rim delay to make the perfect set for a catch.